Week 2: Growing Plants in Water
Have you ever heard of hydroponics? The word comes from the Latin phrase meaning “working water.” It’s actually a really old technique for growing plants in water instead of soil that goes back as far as 600 BC (that’s over 2600 years ago!!). You can try it for yourself with a glass jar, a piece of paper, some masking tape, tap water and an herb cutting. Here’s what you need to know to get growing:
1. Pick the right plant.
OK, so you can’t just drop a seed in water and expect it to grow. You need to start with a small cutting from the right kind of plant. Choose a perennial herb, which is one that comes back year after year (as long as it doesn’t get too cold). Good choices include: mint, rosemary, sage, chives and oregano.
2. Get a good jar.
Recycle a glass jar that’s at least 5 or 6 inches tall with a relatively narrow opening. You want the roots to have enough room to grow nice and healthy.
3. Protect the roots.
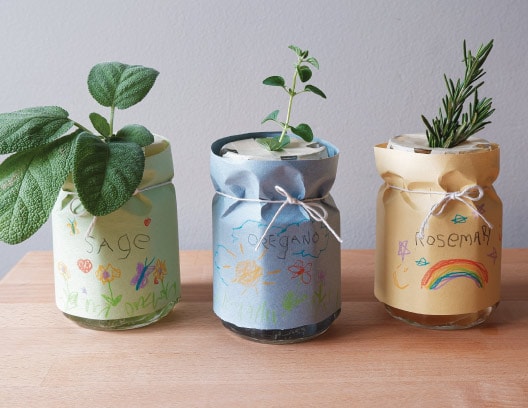
As it turns out, dirt does have one advantage over water — it blocks sunlight. Of course, plants do need light to grow, but they soak it in through their leaves. It isn’t good for roots to be exposed to light. To protect your plant’s roots, cut a piece of plain printer or construction paper to fit around the jar, including over reaching up to the jar’s “neck.” Add your creative artwork, then tape it around the jar, using a piece of string or kitchen twine to secure the paper around the neck of the jar. You can leave about a half inch or so uncovered at the bottom so you can sneak a peek at the roots as they grow.
4. Find a sunny spot.
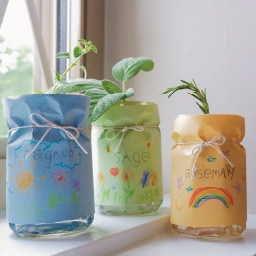
Photosynthesis is the name of the process that plants use to turn sunlight into energy for growing. Make sure you place your plant near a window that gets plenty of sun.
5. Watch your plant grow.
You should start seeing new root growth and new leaves within a week or two. Hydroponically grown plants often grow faster than those grown in soil because they don’t have to work as hard to get nutrients from water as they do to get those same nutrients and water from the dirt.
6. Feed your plant.
Depending on how long you’ll keep your plant growing in the jar of water, you’ll need to make sure it continues to get the right nutrients. Change the tap water every week to replenish the nutrients. As your plant gets bigger, you may need to increase its nutrients by adding fertilizer to the water. You can buy fertilizers specially created for hydroponic growing, or use ¼ the amount of fertilizer that’s usually mixed into soil.
Home Hydroponics
Have you picked your herb? Follow these simple instructions to try hydroponics in your own kitchen.
What You'll Need:
- 1 stem of fresh perennial herbs (mint, sage, oregano, chives, rosemary)
- 1 6-inch tall glass jar (or taller)
- Masking tape
- Kitchen twine, string or ribbon
- 1 sheet of printer or construction paper, any color
- Crayons, markers or colored pencils
- Scissors
- Clear tape
What You'll Need:
- 1 stem of fresh perennial herbs (mint, sage, oregano, chives, rosemary)
- 1 6-inch tall glass jar (or taller)
- Masking tape
- Kitchen twine, string or ribbon
- 1 sheet of printer or construction paper, any color
- Crayons, markers or colored pencils
- Scissors
- Clear tape
What You'll Do:
1. Kids: Fill your jar ²/3 full with tap water. Don’t use distilled or filtered water — your plant needs the trace minerals present in water straight from your sink. Better yet, if you have a creek or pond nearby, use that water! Or even rain water.
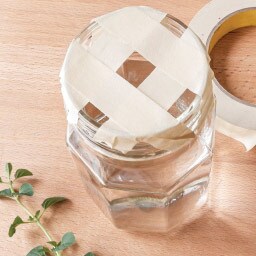
2. Kids: Make sure the top of the jar is completely dry. Then use strips of masking tape to make a square grid across the jar’s opening. This will help the plant stand up straight.
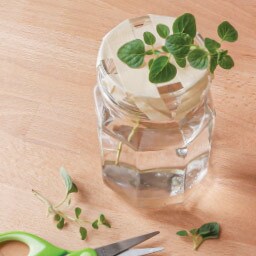
3. Kids: Choose a healthy stem of herbs with lots of leaves at the top. Give the stem a “fresh cut” at the end of the stem, cutting off an inch or so at an angle. Gently remove any leaves on the bottom 4 inches of the stem. You don’t want any leaves to be under water.
4. Kids: Stand the herb stem up in the jar.
5. Kids: Cut a strip of paper to fit around the jar, making sure it’s tall enough to come all the way up to the “neck” of the jar. Decorate it any way you like!
6. Kids: Make sure the outside of the jar is dry. Tape the decorated paper with clear gift-wrapping tape around the jar to keep sunlight away from the roots. Cinch a piece of kitchen twine, string or ribbon around the neck of the jar, securing the paper at the top of the jar.


